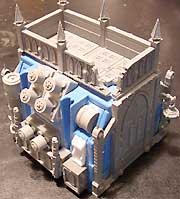
 STC GENERATOR
Next, grab the large tank wheels and glue them to the tops of the pipes.
They should nestle in nicely, and cover up the gap between the top of the
pipe and the angled portion of the box.
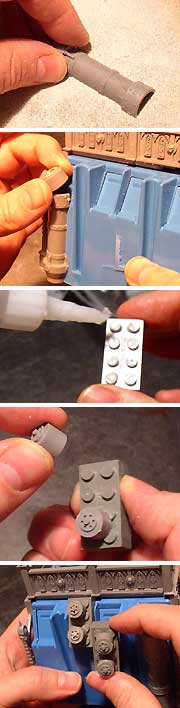
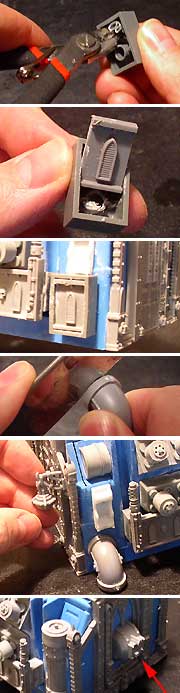
Now for the power coil blocks. You should find that you can friction
fit the back of a small tank wheel into the space between four studs on
the Lego block. Add some glue to the inside edges of the studs, and
cram two tank wheels onto the block as shown. Make four of these
blocks.
Add the blocks to the box by wedging them into the middle angled areas. Test fit them first before gluing. Try to line up the bottom edge of the block with the corner of the box below the angled slot. Angle isn't critical, as long as they all match it should look fine.
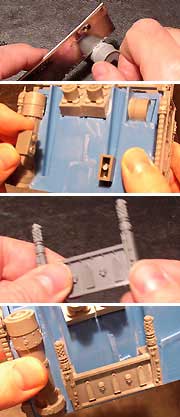
Now get the small 1x2 Lego blocks and add some glue to the studs.
Glue them into the slots on the side of the box, studs facing in, down
near the bottom of the slots as shown.
Now get your two Manufactorum railings and glue the end posts on as
shown.
Glue the assembled railings onto the back of the small Legos. Be sure
to center the railings so they don't overlap the Lego blocks too much at
either end. This should form a nice panel that stands off from
the box.
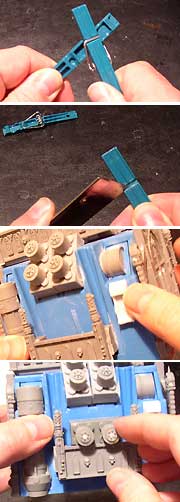
Disassemble your clothespin by twisting it apart. Remove the spring.
Using a razor saw, cut the clothespin tip off, using the spring groove
as a guide.
Sand the back of the clothespin tip on your sanding pad and glue it
onto the box, below the oil drum. Repeat for the other side.
To ensure your generator has plenty of power, make another pair of power coil blocks by gluing small tank wheels to the 2x4 Lego bricks. Add one of these blocks to either side- glue them to the box below the angled blocks, resting on top of the manufactorum railings as shown.
To make a ventilator, grab the 2x3 Lego brick, and using your nippy cutters, remove any plastic from the inside of the bottom of the brick, leaving a nice empty box shape.
Use a razor saw to saw down the sides of a damaged Manufactorum railing
piece until it fits snugly inside the brick. Glue in place.
Now apply glue to the studs of the ventilator and glue it to the box,
below one of the cut down clothespins.
Next, assemble the pipe elbow and saw off the protruding ridge from
one end. Glue this flat end to the other side of the box, below the
other clothespin. Be sure the bottom of the pipe is level with the
bottom of the box- to do this, place the generator on a flat surface, apply
glue to the cut end of the pipe, and rest the other end on the table and
slide it up to the generator until it is attached.
Next, glue the light onto the front of the box, inside the arch of the
right buttress.
Finally, glue the half-round cover piece to the back of the generator, inside the window arch. Now's a good time to add on any of the details you sawed off the back of the panels, if you like.