![]()
IN THE BEGINNING...
When I first started work on the table, I actually started with the
buildings (in case things fell through, I could still use them for my own
games). This actually came in handy while making the table, as I
could position them around the table during construction to see where they
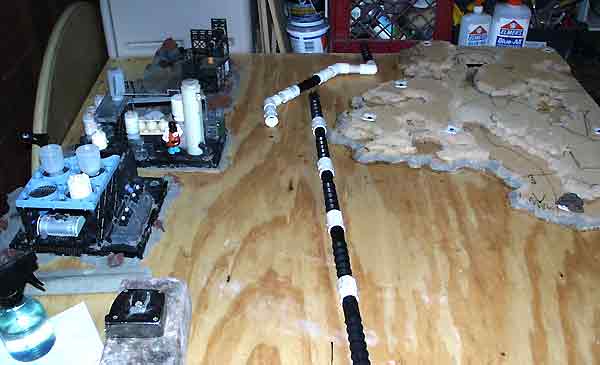
looked best. You can see all 3 buildings resting on an unfinished
table below... Also visible is some of the sprinkler pipe I used
to make the pipeline (more on that below)..
Using my all-too-familiar-now methods for industrial building
construction, my biggest challenge was to keep scale in consideration.
I wanted the buildings to be large enough that they'd provide cover for
mechs, but not look unrealistically large. Fortunately, refinery
type structures are hard to "scale"- fuel tanks can be as small as a car
or as big as a 4 story building. This was especially helpful since
I still did not have any info about what scale the Mechwarrior:
Dark Age models were ( I later found out they are similar to N scale trains,
or about 1:185th).
 |
One advantage of the Mechwarrior universe (vs.Warhammer 40,000) is
that stuff looks a little less gothic, and more high tech. This basically
meant no change to my industrial building style, except that I wouldn't
be spending a lot of time adding rivets and skulls to everything.
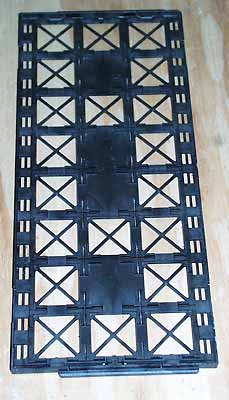
But the biggest aid in the construction of all three of the structures was carbon fiber frames I got from a friend of mine (thanks Mat!). These frames (pictured left) are used to hold computer chips during the manufacturing process, and are extremely hard! They are also somewhat brittle, so I couldn't just clip them with cutters or they'd shatter- I settled for sawing through them with a razor saw (very slowly and painfully) to get a clean cut. The structural detail, large volume (I cut up 3 of these guys), and nice square shapes made them perfect for "framing" the refinery structures. They superglue well and paint up fine, once you get past the sawing, shattering, and cursing. |
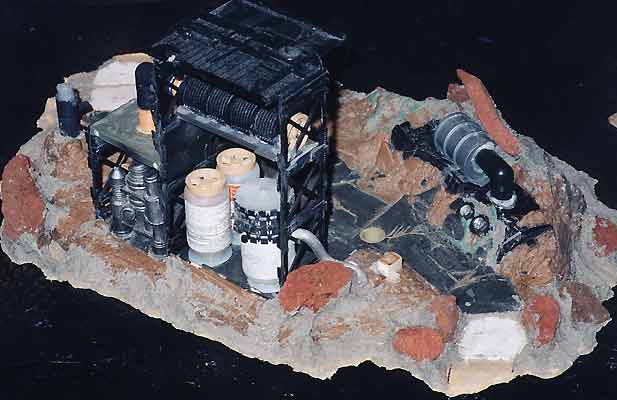
THE FIRST STRUCTURE
I started with a base from a toy play set. I learned a lot from
this piece while making it. First off, the reddish rock in the upper
right corner is actually a flat garden rock I "glued" to the plastic base
to form some cover. What did I use for glue? Concrete
patch! This is where I discovered the amazing adhesive
properties that were later used for the pine bark rocks (described earlier).
The other thing I got from this piece is the style of road- I liked the
segmented, cracked look of the road on the original toy, and actually
made the cardboard roads (described earlier) to match this style.
To base the thing up, I glued the toy playset base to some fiberboard
with Superglue, and blended them together
with concrete patch. I glued on more garden rocks with concrete patch
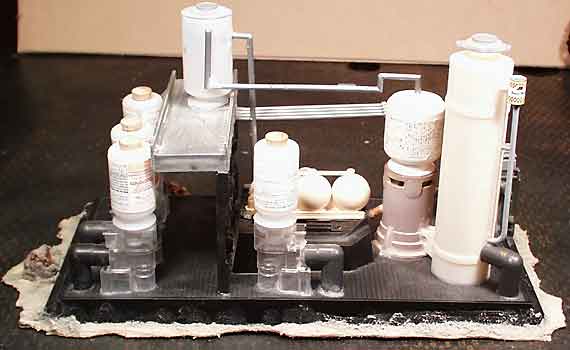
to add a more rocky feel to the base. The fuel tanks are empty medicine
bottles with tank parts glued on. Various toy and model parts
were used to add detail. The elbow pipes are from fish tank filter
units- a friend gave me a whole bag of them (thanks Eric!). He used
to work in a glass shop, and they had extra parts after making aquariums,
so he collected them up for me. The more your friends and family
understand the hobby, the more they can help out...
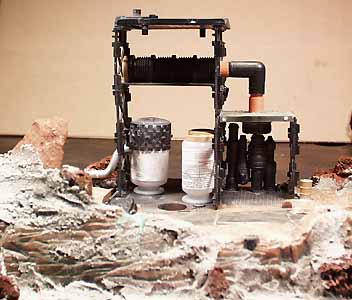
Here's a nice side view, showing the different levels formed by putting
"shelves" between the frames. Note the garden rock on the left, and
the concrete patch holding it in place. You can clearly see one of
the pipe elbows, connecting to a horizontal "evaporation tank" on top (made
from sprinkler cutoff riser- but more on that in the PIPELINE
below). As it turns out, the frames holding up the roof weren't strong
enough for my liking, and actually got chopped down- so there's no roof
on the final version.
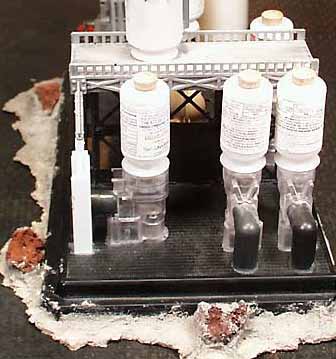
THE SECOND STRUCTURE
I wanted to have a lot more fuel tanks for this one, so I started with
a pretty simple flat base (a display base from a model car). I went
ahead and attached the base to pressboard and added some rocks, as this
helps the piece blend into the table. Most of the fuel tanks
are made from plastic medicine bottles. I saw off the threading,
right up against the flange, so they glue down flat against the base.
One of the shapes that keeps the bottles from looking like fuel tanks
is the "dip" in the bottom. I try to hide the dip by gluing detail
over it. In the case of the upper tanks, I discovered that the plastic
flight stands from flying miniatures were about the same size, and had
a nice shallow concave curve to them that hid the dip well.
The spherical fuel tanks are from Armorcast.
The lower tanks are detailed with wooden cabs I got in a crafts shop.
They are resting on top of clear plastic pieces that I got from a friend-
I believe they are some kind of adaptor for medical equipment. Anyway,
they look great, especially when more of those elbow pipes are added on.
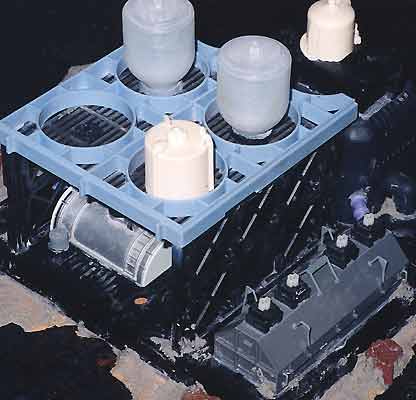
THE THIRD STRUCTURE
Another type of frame I got had circle shaped holes in it (the
blue part in the pic below). I decided to use this for framing around
some elevated fuel tanks. The two identical tanks below are shampoo
bottles from a hotel, with more circular clear flying bases glued on top.
The other two light colored tanks in the pic below are more Armorcast
pieces.
More of the cross piece framing was used to form the walls of this
piece. I left plenty of room underneath for models to wander around,
although I did put a half-round fuel tank down there made from a plastic
toy tanker truck. The grey piece that runs along the right
side of the building is a "G" scale train accessory- it's a coil car cover
that I found on sale in a local hobby shop. The four black and white
details on top are buttons from inside a keyboard I took apart.
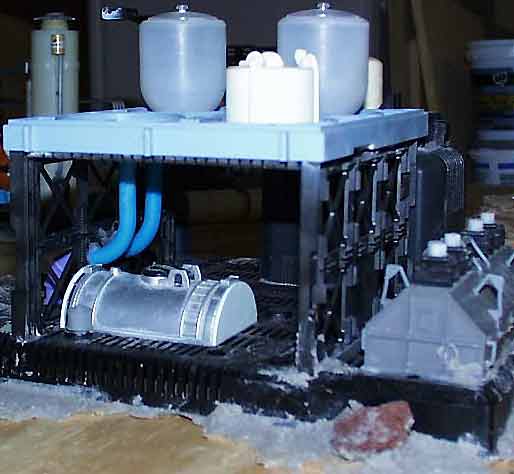
The two blue pipes curving up to the ceiling (and two more purple ones
outside curving down to the ground) are actually pieces of a baby toy-
a series of plastic links you can hook together. They had a nice
diameter and were pre-curved, so I sawed sections out of them to form the
pipes.
All along I was toying with the idea of covering up the gap between
the two table halves with a big pipeline. In the end, I used two
of the buildings and a small section of a rather extensive pipeline network
to do this. The pipeline is made mostly from sprinkler pipe bought
at the local Hardware (DIY) store. I bought sprinkler cutoff risers
(the black things) to form the main line. These are covered with
threading, since they are designed to be cut down to the correct height
for a sprinkler head, but I just like them 'cause they're loaded with detail!
I also bought some 45 and 90 degree elbows and a bunch of threaded connectors.
I used the 90 degree adaptors to run the pipe into the ground at the ends
(I had to cut off some of the adaptor so the pipeline would sit flat on
the table). After screwing the whole thing together, I simply screwed
it down to the table with wood screws run through the couplers. I
then covered up the screw heads with plastic shields (from the Games Workshop
miniatures line), since they looked kinda like pipe endcaps with their
raised lip and rivets around the edges (the grey things in the picture
below).
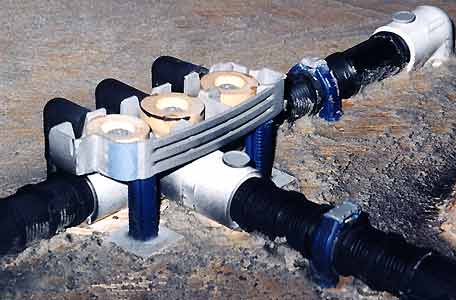
To add even more detail to the pipeline, I used the curved ends from
plastic razor handles to form support brackets (blue things in the picture
above). I bridged across the top with track plates from the old GW
"Ork Battlewagon" kit (now discontinued). I used a lot of screws
to hold down the T intersection, so I decided to build a small structure
on top to cover them up and give the pipeline even more character.
I used a pull out drawer from a PC computer case, and glued three wooden
shapes inside it. I added some tank wheels inside these shapes for
more detail. Then, I added three elbow pipes running from the side
down to the ground- these are from the fish tank filters again (so you
can see the size difference between the filter pipes and the sprinkler
pipes).
On to Part 4: Painting
See the completed Mechwarrior Table
Back to the How To pages
Back to Necromundicon