Okay, this is where I admit that I'm a bit eccentric when it comes to painting... I use flat enamel paints for all my painting (Testors brand, as it so happens). The techniques described here work just as well with water-based acrylic paints, though the enamels tend to be slightly darker and just a hint shinier. I prefer enamels for their durability and they make excellent washes. Oh, and they smell wonderfully toxic.
On to business. Spraypaint the whole model with flat black spray
primer and let it dry. Now base coat the main colors by drybrushing
them. How do you drybrush? Start with a large, stiff bristled
brush (flat heads work best, but any shape will do). Load your brush
with paint, then wipe it on a pad (I use an old phone directory) until
it is mostly dry, then rub the brush on the model to paint the raised areas.
Try to go across the grain of detail so the brush catches the "edges" and
minimizes brush streaking.
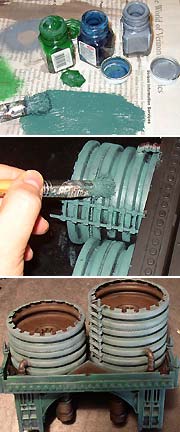
Drybrush the tanks in a nice distinctive color. I mixed up a custom Teal blue color for mine, using green, blue and grey. Then use a lighter drybrush pass with light grey for highlights. Drybrush the tops and insides of the tanks, and all the pipes, with dark brown. Drybrush the rest of the tower in a darker color. I used dark blue-green for mine. Highlight with a lighter pass of drybrushing using light grey. |
|
Now for the washes. What's a wash, you ask? It's
paint, thinned down to a near-waterlike consistency. When dabbed
onto a model, the wash will run along cracks, down steep sides, and into
fine details. It's ideal for rust and grime effects. For enamel
paints, thin with mineral spirits. Note that if you are using acrylics,
add a dab of dish soap to help the flow. Too much water and your
wash will tend to bead up before it dries, leaving splotchy drops (yuck).
You can also use ink washes, but they dry glossy, so you'll want to flat
coat them once they dry. Either way, I like to use a small paint
lid to mix up a batch of wash. Test consitency before applying.
If you put on too much, you can usually wipe off the excess from the high
areas with a towel, so don't settle for less than great washes.
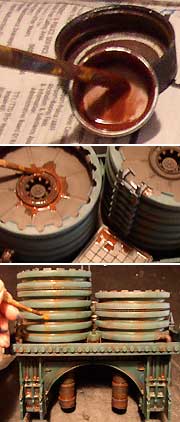
Anyway, I like to use a rust color for the main wash, working from the top down and brushing streaks down the sides here and there. Be sure to hit the pipes and rivets heavily. Using care, you can control your streaks with a fingertip or gentle blowing. Next, switch to a light brown and hit the same areas again, but more sparingly this time. As a guide, rust can range from near-black to bright orange- dark rust is old rust, light rust is the most fresh. |
|
Once your washes are dry, switch to metallics. I like to mix
steel and brass together, with some black or dark brown to dull them down.
Drybrush all the sharpest edges of the model. Be sure to catch the
top edges of the tanks, and the edges of the ridges too.
Metallics are also great for highlighting rivets. Gently drybrush over the rivets, holding the brush at an angle so it doesn't smear paint onto the surface below the rivets. 
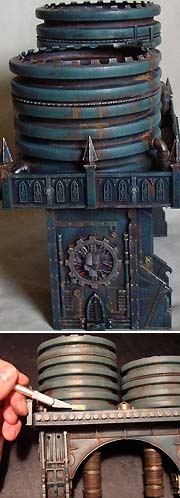
Now you can get in there with a fine brush and paint any details like
cables, gauges and skulls in contrasting colors like red, yellow and white.
Finally, add decals as you see fit. I have a fondness for the stickers from Zoids model kits, as they are easy to apply, durable, and suitably techy looking. When applying stickers, affix an edge of the sticker to the side of a hobby knife- this makes positioning a lot easier. If you have to rip the sticker off, it might take some paint with it! Once your decals and / or stickers are affixed and dry, coat them with a matte finish / flat coat to take any shine off. Mixing a tiny bit of dark brown into the flat coat will help darken down the graphics to better match your grimy paint job! |
Copyright 2006 Sean Patten