![]()
![]()
Sooner or later, you're going to feel compelled to make a piece of terrain with water in it- a sludge pit, boat dock, effluent dump, mud field-- maybe even a river, lake or beach (gasp!). Here's a very quick word on how I like to do water (now that I have tried a few other, less appealing methods).
The first step is to build your water area. Just make it relatively flat and make sure there's no gaps around the edges. You can add a bit of sand or debris if you want. Next, paint the water area really dark (black if you like)- I like to use dark brown spray paint myself. Now add some color around the shores- try to blend from the shore color down into your darker colors. Green is an excellent color for water, blue tends to look fake. Paint on streaks if you want a sense of motion.
Next, save yourself a lot of suffering and get some WOODLAND SCENICS INSTANT WATER from your local hobby or train shop. This stuff is great- pours right out of the bottle, no mixing, nontoxic, can be dyed with ordinary acrylic paint, cleans up with water, etc. etc. Better in every way than clear cast resin. And most importantly, it doesn't shrink much, and is very flexible so when it does shrink, it just stretches instead of pulling away from the edges (grrr... don't wanna talk about it).
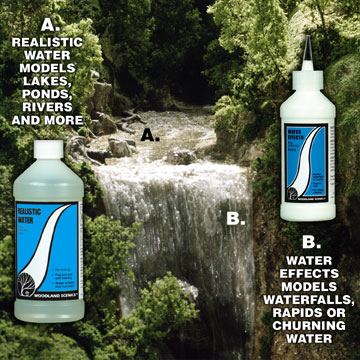
Here's a pic of the Instant water (and its companion product, Water Effects), to help you track the stuff down.
 |
To use instant water, you just pour it on. That's pretty much
it! Don't pour more than a quarter inch thick at a time though, or
it will take forever to dry. You can brush it around if you
want, but I like to just tip my piece and roll the stuff around until my
surface is covered and the water is touching all the edges (just pour on
a bit more if you need to).
You can also "tint" the water by mixing some paint into it (acrylics work fine). You can paint streaks of green into it to represent algae. Or if you want the water to look cloudy, mix some beige into it (the more you mix, the more cloudy it gets). Finally, you can add "foam" effects by stippling white paint onto the surface of your water around rocks and at the base of waterfalls. Once the white paint is dry, brush over it with one more thin coat of Instant Water to keep a nice glossy finish on it. To be honest, I haven't even used the Water Effects product yet, but I did pick some up... Supposedly you just squeeze some out onto a piece of plastic, mush it around until it looks like streams of water, and wait for it to dry, then peel the plastic off and press it into shape, using a bit more of the stuff to glue it in place. Cool! |