TRENCHES
Since they involve lots of dirt and sand, I've included my new Trench
scenery in the Gorka Morka section (although they work in any environment).
After looking at GW's trenches (first seen in 40K 3rd ed), I always wanted
to make my own, but I needed mine to be more modular and easier to store.
I finally got around to making some trench scenery that looks good and
is manageable. To find out how I made them, be
sure to see the how-to section on making your own trenches!
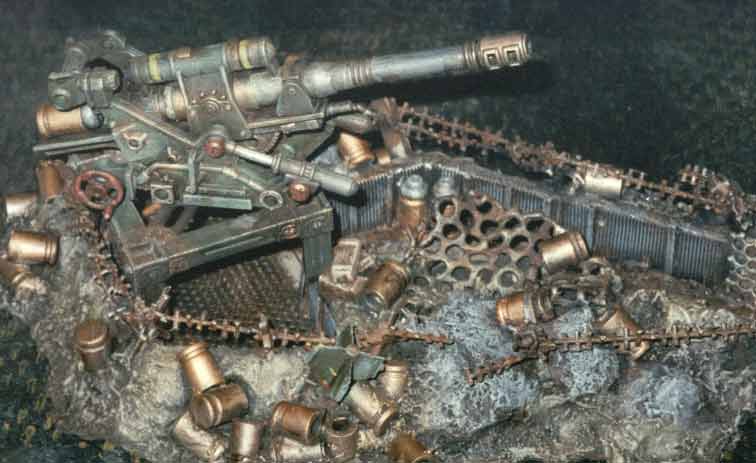
After seeing pictures from World War I, I knew I had to include an
artillery piece in my trenches, littered with spent casings. The
cannon is from a line of cheap, decent quality army action figures, mounted
on a frame from a construction toy. The shells are cartridges from
a toy gun, cut in half. I used a variety of brass, steel and copper
paints (plus a thorough brown wash) to give them some character- each one
is a slightly different color to represent varying ages. One thing
about trench warfare to remember- nobody's going out there to tidy up!
Debris tends to pile up as a result (until it sinks into the mud anyway).
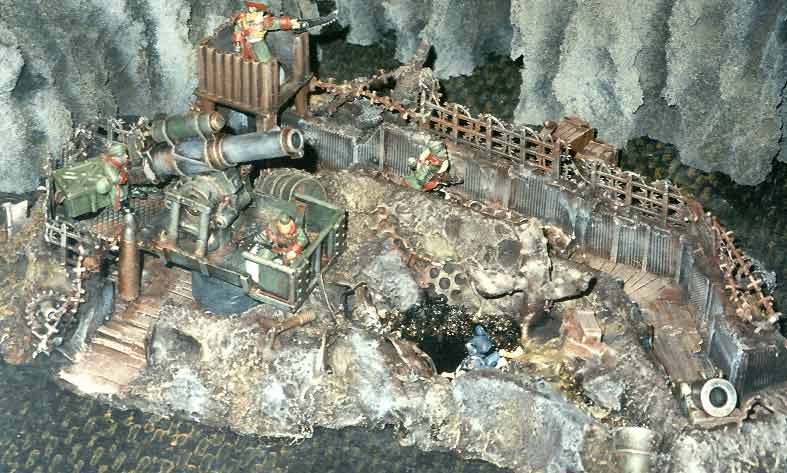
Another gun emplacement- this time I mounted an Armorcast vehicle's
mortar onto a Gorka Trukk chassis, added rails, and dropped it into a section
of trench wide enough to accomodate it. To speed up construction of my
trenches, I used a lot of the Armorcast trench pieces, then embellished
with more rocks, dirt and detail for a more realistic look.
Most of the barbed wire on this piece came from an army toy. Note
the muddy pool in the foreground- after painting the piece, I poured a
thin layer of gloss Varnish in there (it's probably still drying even now).
This is my command center. I made a covered trench section by
adding brick wall pieces and wooden supports, then topped it with a piece
of Battlemasters movement base, and then added an offset bunker top (from
Armorcast) embellished with railing piece made from a bracket I found.
Then I built up the dirt walls with lots of rock, filler, and sand so it
really looks underground inside. This piece shows off both types
of barbed wire (The strand type is made of plastic grid, cut to a single
strand and twisted).
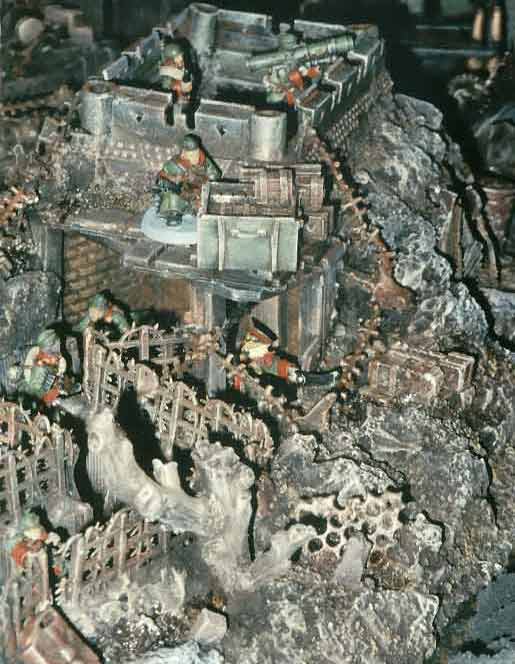
Here's seveal of the trench pieces crammed close together. My
Valhallans can be seen crewing the guns and manning the trenches!
This pic shows off the variety of perforated metal pieces I used, and how
nice the wood floorboards come out when drybrushed.
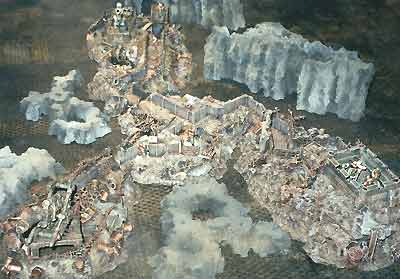
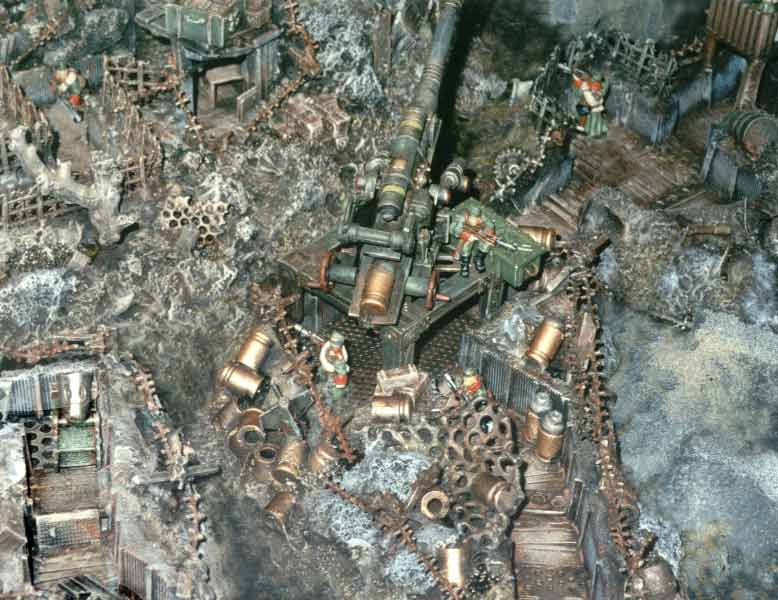
Here's the four pieces I've made so far in a fairly practical arrangement.
This makes a pretty extensive battlefield when supplemented with ruins,
rock crags, barricades, etc. (the rocks are made of mattress foam, spraypainted
black, then grey and brown for highlights. Quick, easy, and durable!).
HOW TO MAKE TRENCHES
Back to Gorka Morka Scenery
Back to Necromundicon