SPACE HULK: SECTOR 1
I'm in the process of upgrading my Space Hulk corridor
terrain... I'll try to get better pics of the older pieces at
some point, but until then, here's a couple shots of my latest pieces.
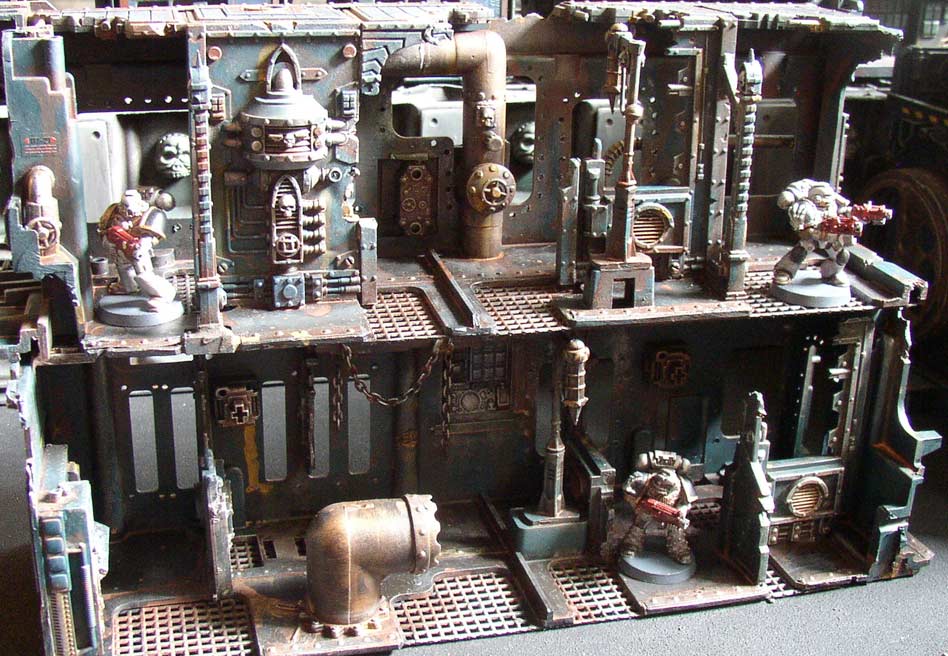
These two sections are stacked on top of each other, showing their
versatility. The main shell is made from the internal cage of an
old VCR I tore apart. This was detailed with Cities of Death
parts, various pipe fittings, and lots of rivets and drilled
holes. Holes in the floor were covered with cross-stitch grating
from below. Other details like parts from the Chemical Plant kit
and some jewelry chain can also be seen.
The roofs of these corridors were made with Cities of Death floor
panels. I added the strips of rivets to them by embossing some
strips of thin plastic with a 1/16" hole punch.
Look for more high quality photos soon... until then, here's some older
shots of my earlier terrain.

Long ago , whenever we played a game on a Space Hulk or in a Sewer,
we used the board sections from the Space Hulk games (both old and
new).
It was only after accumulating a giant stockpile of appropriate
materials
that I decided to make 3D terrain to replace the 2D boards. The
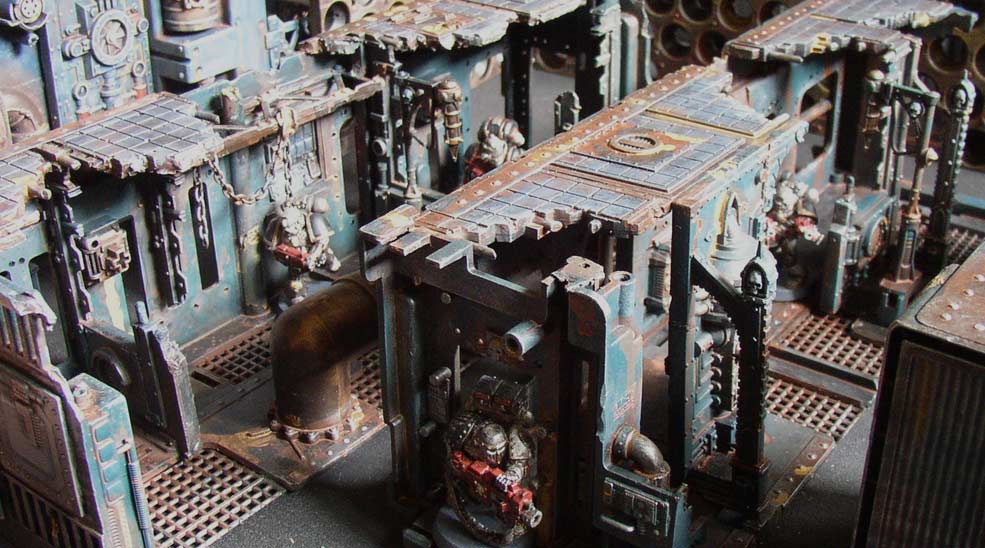
picture
above actually includes 3 seperate pieces of terrain- two wall
sections,
stacked on top of each other, and one floor section. For wall
sections,
I build them like a diorama, with a floor, back wall, and hint of a
roof
to give the feel of a hallway while still making the piece accessible
to
miniatures. The floor sections can have walls on all sides,
but
have no roof elements, and tend to be only 1 storey high (vs. the 2 of
a typical wall section). The floor section seen here is a
heavily
modified component from a G.I. Joe play set a friend of mine found in a
thrift store. The toy had great floor panel detail and a good
start
for walls. I added the consoles (from Armorcast), pipes, the
overpass
(made from a toy truck bed), and outer walls to cover up gaps, made
from
parts of a Printer case.
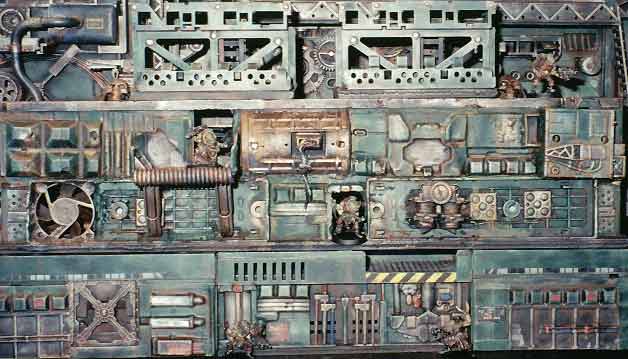
I try to keep the top of the wall sections flat, so miniatures
can traverse the tops, but it also means they can be stacked.
This
shot shows the "back" side of the two wall sections I've made so far,
plus
two smaller connector sections I stuck on top. That makes the
whole
thing at least 4 storeys high in this shot! A couple doorways go
through the walls of the middle section, allowing access to both sides
of the piece. By detailing both sides of a wall section, and making
each
wall section 2 storeys high where possible, you can get a massive
amount
of playable area for a single piece- even more than you could with the
2D hulk tiles. Of course, I have a long way to go before I
have that much hulk scenery- I have several pieces that have been
started
but never finished...
I used all manner of bits to detail the Hulk pieces. A lot of
area was covered by Vacu-formed plastic panels that filled out detail
very
quickly. Can you recognize any other details? There are toy
parts of course, including a number of tubes and cables from Spawn
action
figures, Support legs from an undersea toy, and panels from a Star Wars
Podracer Hangar toy. Household objects such as razor handles,
hair
curlers, flourescent light panels, and even rivet gun strips are in
there
somewhere. Computer components include a cooling fan, frames from a
removeable
CD-ROM holder, and wires and connectors. Games Workshop
materials
include a Necromunda Bulkhead, a 40K fuel drum, and even
Epic
Bases!).
CLICK HERE TO BOARD SPACE HULK
SECTOR
2!
Back to Industrial scenery
Back to Necromundicon